
So at the risk of this site mostly being tech stuff I’m posting another how-to, rough-guide, self-documentation regarding Tor.
I hadn’t planned this as I’m currently a) meant to be completing a PhD funding application, b) should be trying to find a job and c) trying to focus on music related things rather than tech for a little while.
Anyway, @moananddrone got me intrigued by the Enterprise Onion Toolkit (EOTK) https://github.com/alecmuffett/eotk as he’s got a project requiring it and wanted me to help look at it with him.
I won’t share any details of the project as Kevin will be talking about that at some point, in the future, as appropriate.
Still I wanted to share my own experiences of trying out this tool and deploying it using Google’s cloud infrastructure.
There are political considerations in using Google’s (or Amazon’s etc.) cloud platforms and I’m not agnostic towards such politics. I also want to keep myself educated about the various technologies in use so this seemed like a good opportunity to test out EOTK, have a play with Google’s free introduction to their cloud services, and do all of this separately to my existing Tor installation (which works well as is — I didn’t want to risk breaking my configuration with another toolset).
Google Cloud Platform
I’m not really documenting this part of the process very extensively as they’re just visual web forms which are fairly self explanatory to complete and this would just be a series of screenshots which I don’t want to do. If anyone reading struggles here though and the help pages don’t answer your questions feel free to comment and ask questions.
First thing was to signup to Google Cloud Platform’s free trail - https://cloud.google.com/
I then created a new project and a Compute Engine VM.
I’m not 100% sure what I’m doing here but I’m trying only a micro instance with Ubuntu 16.04. I also opted for European data centres simply because European data privacy laws are generally speaking considered better that US ones (a complex and contentious issue but for my current needs this simplification is appropriate).
I’m not familiar with the firewall settings here either so I’ve enabled HTTP and HTTPS. We’ll see if I need to do more config later.
The online SSH client is truly impressive. Just click the SSH button/link and you get a web based terminal.
Installing EOTK
First things first:
sudo apt-get update

sudo apt-get dist-upgrade
Now to install EOTK
git clone https://github.com/alecmuffett/eotk.git

cd eotk

./opt.d/install-everything-on-ubuntu-16.04.sh
Hopefully everything is now installed.
Setting up an EOTK Project
Lets try it, still in the eotk folder we can run:
./eotk gen
This generates an onion key file, in my case u35unrkwyvkcdxsl.key. Copy the name of this, we’ll need it in a moment.
Let’s set up a configuration file. I’m going to call it mroystonward.conf but you should call it whatever you like but keep the .conf at the end.
nano mroystonward.conf
In the nano text editor we need to write the following:
set project mroystonward
hardmap secrets.d/u35unrkwyvkcdxsl.key mroystonward.github.io
A few notes here. mroystonward is the name of my project. Use here whatever you used previously.
secrets.d/ is the folder where eotk puts onion keys so this needs to stay the same.
u35unrkwyvkcdxsl.key should be replaced with whatever onion key you generated above.
mroystonward.github.io is the domain I’m mirroring via Tor. You should put whatever domain you want to mirror.
A few notes here though. Don’t put the www hostname.
You can do quite complex subdomain setups which I just don’t need in this example. Check the docs and video - here and here
Firing it up
Now run (replacing the name of the conf file with whatever you chose earlier):
./eotk conf mroystonward.conf
and (with whatever project name you chose earlier):
./eotk start mroystonward
That’s it, it’s running. We can check the status using:
./eotk status mroystonward
And you should see both Tor and Nginx processes listed.
In Tor Browser you can now visit your onion address (mine is u35unrkwyvkcdxsl.onion).
Like me you probably now encounter some errors and warnings.
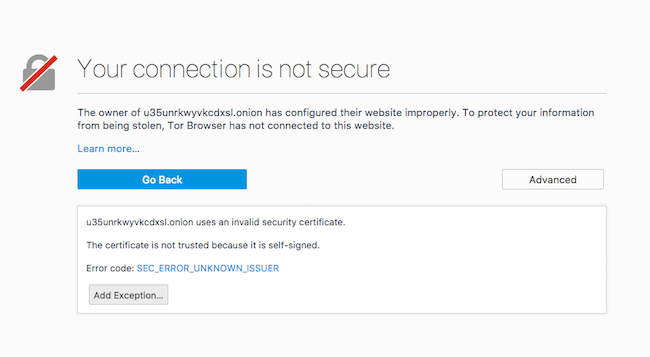
SSL Certificate Problems
This is expected behaviour and it’s because the SSL certificates are self signed. You’ll need to click ‘advanced’ and add an exception. You may have to do this several times.
There’s not a huge amount we can do about this either.
Certbot/LetsEncrypt doesn’t currently support .onion domains so getting free/simple SSL isn’t an option.
You currently need an SSL EV certificate which, i.e. from DigiCert, costs ~$250. For non-corporate projects this is a) expensive and b) I’m led to believe is hard to get without the proofs that accompany corporate infrastructure/incorporation etc.
Depending on the nature of the site HTTPS may not be entirely necessary. This is a new area for my investigations into Tor etc. My current understanding is that the layers of encryption provided by Tor preclude the need for HTTPS on security grounds. I may be wrong here though. Feel free to comment. A HTTPS certificate does however help with proof of ownership and trust, even in an onion environment.
Useful resources in starting to consider the pros and cons of HTTPS over Tor:
- https://www.eff.org/deeplinks/2012/03/https-and-tor-working-together-protect-your-privacy-and-security-online
- https://www.eff.org/pages/tor-and-https
- https://blog.torproject.org/facebook-hidden-services-and-https-certs
What these resources don’t make sufficiently clear is the different ways one may choose to use Tor.
You may use the Tor browser for increased privacy/anonymity whilst browsing clear-net websites (i.e. *.com, *.org, *.net, *.co.uk etc.). The EFF graphic describing the different levels of protection Tor and HTTPS together offer is referring to this kind of browsing. This is one reason the Tor browser includes (and benefits from) the HTTPS Everywhere plugin.
You may also use the Tor browser to access .onion sites (as we’re setting up here). That this relies upon secure keys provides similar protections to HTTPS. You also know that only one site has this key and so when you connect to an onion domain it is almost certainly the site you think it is. You might not know who owns the site and they may not have your best interests at heart but it’s not anyone else pretending to be that site or intercepting traffic etc.
Still, we now generally understand that when the browser gives us a security warning about certificates we should take this seriously. Encouraging users to just accept self-signed certificates isn’t good practice either.
Trying HTTP Only
If we don’t need HTTPS we can add this line to the mroystonward.conf file:
set force_https 0
You’ll need to stop, rerun configuration and then start your project again:
./eotk stop mroystonward

./eotk conf mroystonward.conf

./eotk start mroystonward
Whilst this is useful to note it doesn’t work for me as this entails downgrading from HTTPS to HTTP.
But Don’t Downgrade from HTTPS
Whilst I’m not yet sure of my position regarding the benefits of HTTPS over Tor for a fairly simple static website with little in the way of logins or cookies, if the original site is already HTTPS, downgrading would be considered bad practice and if there were any secure cookies and or data submission on the site we would now potentially be introducing all sorts of security holes. The EOTK developers are looking into this but for now there isn’t really any elegant solution. Tor are also considering how the Tor browser should handle onion sites with self-signed certificates.
Added to this, I host mroystonward.github.io using github pages. A nice feature of this is that they enforce HTTPS. That unfortunately means that even if I set force_https to 0, the part of the process which involves github serving the clear-web site to the EOTK process is all enforced in HTTPS. That means that I’m trying to downgrade to HTTP which isn’t recommended or supported as above. There are inelegant ways around this but none that are available to me as I can’t alter how github serves it’s pages.
Startup Scripts
I also faffed around for quite sometime with startup scripts via the compute engine metadata flags but I could never get everything running properly. To save you time don’t bother. Luckily EOTK comes with a handy init script tool.
Run the following commands (in the eotk folder still):
./eotk make-init-script

sudo cp eotk-init.sh /etc/init.d

sudo update-rc.d eotk-init.sh defaults
That’s it, it’ll now start all projects on boot.
Parting Thoughts
It all seems very slow to me so far (and slower than a site I directly run as a Tor service from a Raspberry Pi).
UPDATE: Things seem a lot faster now so my speed concerns seem mostly unfounded.
I know, for example, images on the github site aren’t very optimised as a compromise for the simplicity of the static site publishing process (something I’m looking at fixing at some point). I scaled up the cloud VM to see if that made a difference and too be honest I don’t think it has so I’m sticking with the cheaper micro option for now.
So, interesting exercise. If you fancy trusting my self-signed certificate you can see this in action at u35unrkwyvkcdxsl.onion. I’ll leave it running for a while and see what happens but I doubt it’ll be up for a long-long time.
I’m also impressed by how easy this was to set up on a cloud platform. It suggests the possibilities for temporary set-up/use/tear-down approaches as needs fit. One could easily clone the git repo and add in some default conf files and automate the initialisation process.
Also, the options to use a small cluster of RaspberryPis and OnionBalance for all of this is super intriguing too but I don’t yet have a use case for it to justify getting more Pis - https://www.youtube.com/watch?v=HNJaMNVCb-U
Hope this helps you have a play around too.