
I’ve previously talked about how to set up Tor Hidden Services, at home on a Raspberry Pi. As I’ll be moving around soon and not have a permanent base to run such a mini-server I have been thinking about what to do.
One option would be to take it with me and run it as a portable, nomadic server. This is appealing on several fronts but not practical for me right now as under some circumstances encryption technology and the use of Tor is highly scrutinised and problematic. Whilst I’m simply self-hosting and publishing my own music, therefore acting perfectly legally, not everywhere in the world sees it that way and unwanted scrutiny might jeopardise the projects of others I will be associated with. This is all probably a little extreme but it’s not a risk I’m currently able to take. Basically I’m going to temporarily be in a political context where I’ll very much have to toe the line for personal reasons.
Another option would be to have a friend or family member take on the little server. Whilst this is feasible it’s not what I want to do right now. Especially because having to ring someone up and ask them to reboot it if there’s a problem is fine if it works first time but if troubleshooting becomes more difficult, it can become a burden.
A third option would be to simply cease running the hidden service for a while. Not what I want to do.
Finally then, I need to move from the small home-based server to another hosting solution. I could rent server space, set up a VPS etc. or, and I’m a curious fan of this at the moment, play with so-called ‘cloud’ solutions.
This is problematic. My desire to publish independently in a way that critically engages with the economies of ‘platforms’ will now rely on the infrastructure of some of the largest and richest private companies in the world and be embedded with their numerous disturbing business practices and lines of money/power.
I still have free trial credit with google though that I would like to use up and, at this stage, as a learning exercise, I feel that engagement with these platforms in such a way is beneficial. It helps me to develop technical skills and knowledge plus, by reporting this way, I can also help share this knowledge. Whilst ideally, at some point, I would move these services again, to somewhere less problematic, for the meantime it’s a simple and accessible solution to my problem.
So… onwards.
Setting up Google Compute Engine
If you want to follow this guide you’ll need an account at https://cloud.google.com/. You can get free trial credits that, for low level usage such as this, should last for a year.
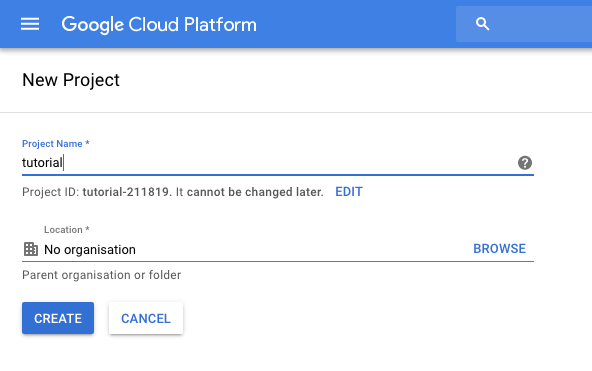
Once we have an account we’re going to set up a new project. Call it whatever you want… for this example I’m using ‘tutorial’.
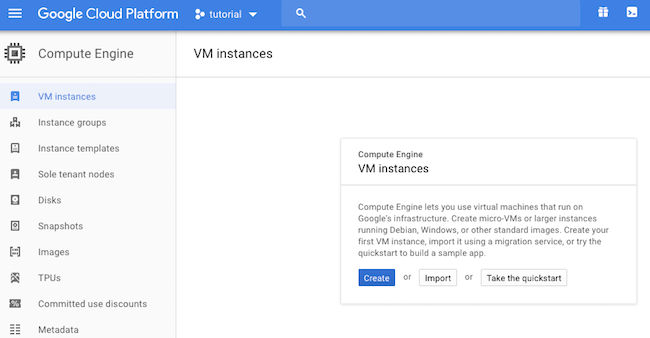
Now we’re going to choose ‘Compute Engine’ from the lefthand menu and ‘create’ a new ‘VM Instance’.
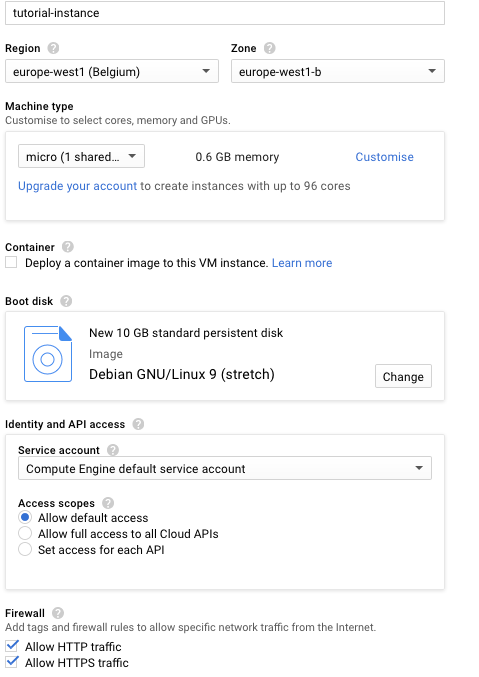
Give it whatever name you want (I’m using ‘tutorial-instance’); choose your region (I opted for European data centres, I especially didn’t want to use US ones); machine type should just be ‘micro’ as we don’t need more power and it’s cheaper this way; boot disk should be Debian 9; on the firewall add HTTP and HTTPS access.
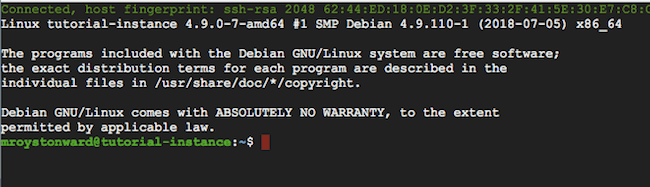
That’s it, we now have a fresh Debian instance to work with. Google cloud has a really good web based SSH Terminal so click on that, allow pop-ups if they are blocked and initiate the connection.

Installing Tor
We need to run some commands in the terminal to get everything set-up and installed. First update the OS:
$ sudo apt-get update
$ sudo apt-get dist-upgrade
Next we’re going to follow Tor instructions here - https://www.torproject.org/docs/debian.html.en
We need to add package sources so create a new file in the correct folder:
$ sudo nano /etc/apt/sources.list.d/tor.list
Paste this into the new file nano has just created:
deb https://deb.torproject.org/torproject.org stretch main
deb-src https://deb.torproject.org/torproject.org stretch main
ctrl + x to save and quit.
The package sources have now been added but things aren’t fully set up yet. First we need the apt-transport-https package to work with https urls. Next we’ll need dirmngr as it’s necessary when working with the gpg key.
$ sudo apt-get install apt-transport-https
$ sudo apt-get install dirmngr
To install Tor securely we also need to set-up the gpg key. I had trouble with this unless I ran the following commands (from the Tor instructions) as sudo:
$ sudo gpg --keyserver keys.gnupg.net --recv A3C4F0F979CAA22CDBA8F512EE8CBC9E886DDD89
$ sudo gpg --export A3C4F0F979CAA22CDBA8F512EE8CBC9E886DDD89 | sudo apt-key add -
Now that’s all set-up we can run apt-get to install Tor as follows:
$ sudo apt-get update
$ sudo apt-get install tor deb.torproject.org-keyring
That’s it, Tor is installed.
Installing nginx
Next we’re going to set up a webserver. Apache isn’t recommended here simply because it bigger and more complex than we need. I’ve previously used lighttpd sucessfully but this time I am going to go with the commonly recommended nginx. First run:
$ sudo apt-get install nginx
As I’m not running a site anonymously (I have public facing versions of the same site) I don’t need to worry about many of the warnings usually made about running hidden services. General server best practices should be adequate.
A few settings we will still change with a view to minimising possible information leakage are as follows. Edit the file ‘/etc/nginx/nginx.conf’:
$ sudo nano /etc/nginx/nginx.conf
In the http section we’re going to set server_tokens to off and set some logging options like this (… means leave the other bits as they are and we’re pretty much disabling logging):
http {

...

        server_tokens off;

...

        ##
        # Logging Settings
        ##

        #access_log /var/log/nginx/access.log;
        #error_log /var/log/nginx/error.log;

        error_log /dev/null crit;
ctrl + x to save and quit.
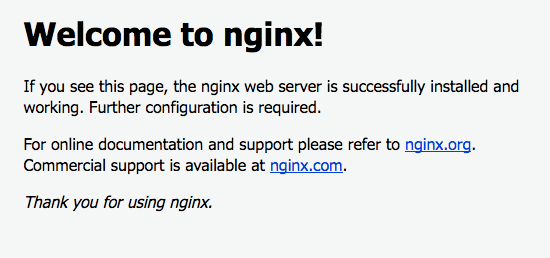
That’s the basic set-up for nginx and it should be up and running. You can try by visiting your instance’s public IP although only HTTP will work so check the address bar if you have connection issues.

You’ll only see a very basic nginx landing page but at least we know it is working.
The sites I use this for are publicly hosted using other services (such as gitlab pages) and the Tor version is a separate mirror. This might not be the case for you and, for non-anonymous sites, you may want to serve both publicly AND over the Tor network from this install. The next steps aren’t entirely necessary or correct if that is the case. The set-up for Tor will be near identical but you’ll want to set-up nginx to work as a regular web server too.
In my case though I DON’T want this nginx install to be public facing at all. To achieve this I’m going to change settings so that nginx only serves via a locked down port from local connections (that Tor can still access).
You’ll need to edit /etc/nginx/sites-available/default
$ sudo nano /etc/nginx/sites-available/default
All you need is as follows so you can safely delete the other section and comments.
We’re telling nginx to only listen on port 8080 from local connections and to block any other connections. We’re setting the root directory where our website files will live and we’re defining valid index pages.
server {
        listen 127.0.0.1:8080 default_server;
        server_name localhost;
        root /var/www/html/;
        index index.html index.htm;
        location / {
                allow 127.0.0.1;
                deny all;

        }
}
ctrl + x to save and quit.
Next we must restart nginx:
$ sudo service nginx restart
If you refresh the web page it should no longer work as we can’t access the web-server other than locally (which Tor will be able to access and proxy over hidden service requests).
Configuring Tor
The final piece of the puzzle is to configure a Tor Hidden Service.
$ sudo nano /etc/tor/torrc
Uncomment the two lines below and change the port settings as below. The first 80 is standard webpage port, you could change this but would then need to specify a port when browsing an onion address so 80 is standard. 127.0.0.1 is localhost and matches our nginx settings from earlier (remember we blocked access from anything other than local connections). :8080 is the port we specified in nginx set-up. We could use any different port to 8080 but the nginx and Tor config must match.
HiddenServiceDir /var/lib/tor/hidden_service/
HiddenServicePort 80 127.0.0.1:8080
ctrl + x to save and quit and then restart Tor.
$ sudo service tor restart
Tor will now generate the onion address for this hidden service and we can see it with the following command:
$ sudo cat /var/lib/tor/hidden_service/hostname
In my case it generated ‘arpf35uo2uscuxso.onion’.
We need to use the Tor browser to visit onion addresses so open it up and visit your onion address.
You should be getting an error page. When we set up nginx we specified some valid index pages. The default nginx debian index page is actually ‘index.nginx-debian.html’ which falls outside of the scope of our project.
We can fix this by making a web-page called index.html.
$ sudo nano /var/www/html/index.html
Type the following:
<h1>Hello World</h1>
ctrl + x to save and quit.
Now refresh Tor browser and you should see your new web page.
In principle that’s it. You can put your web files in the /var/www/html/, nginx will serve them locally like a regular website, and Tor will proxy it to the onion address accessible via Tor browser.
Taking Things Further
This is great and relatively simple. It doesn’t quite cut it for me though. I want to host multiple sites so will need to set up ‘virtual hosts’ in nginx. The House Organ’s website is built using jekyll and uploading the generated site files to this Compute Engine every-time I make an update is problematic. In fact, transferring files to the site folder isn’t entirely straightforward under any circumstances. There are solutions to all of these problems and I will address them in future posts.


![By Photochrom Print Collection [Public domain], via Wikimedia Commons](https://commons.wikimedia.org/wiki/File%3AMatlock_High_Tor%2C_II.%2C_Derbyshire%2C_England-LCCN2002696696.jpg)